
Ok, so if you’ve been following me for a while you will know all about the current building works we have going on for our new kitchen/diner extension. If you haven’t, let me fill you in and get you up to speed on what’s been happening!
Ben and I bought our beautiful family home last year after quickly discovering our house at the time was not big enough for a new baby and everything that comes with him!
We sold our old house to the first person who came to view it which was early Feb 2016 and we moved into our new house in the July and from the moment we first viewed the property we could see that it was crying out for an extension! (Before pictures to follow shortly)
Ben and I bought our first property in 2012 and it was a complete doer upper which we loved, we literally stripped everything back to the bare bones in that house and did everything ourselves to suit our tastes and what we wanted and loved every minute, so we knew that we wanted our next house to be somewhat of a project too. We love to be able to put a real stamp on the place and despite knowing it would be more complicated this time around with having Noah added to the mix, we were still set on wanting to buy somewhere that we could really do something to. There’s nothing more satisfying than making big changes and seeing your hard work pay off, it makes you appreciate it all so much more.
As soon as we moved in we arranged for a couple of local builders to come and have a look at our kitchen and discuss the ideas that we had. Luckily, one of the builders gave us the number of a great architect who he does a lot of work with, so we then contacted him and once he had come to visit us and produced the drawings and plans that we needed, the builders both gave us their quotes for the proposed work and to our delight, we chose the builder who we had known from the very start we wanted to go with. We had seen their vans here there and everywhere which to us felt like a sign, and hearing from other people that they were known for their high standard and excellent work it was a no brainier for us (not to mention that he and all of his team are so so nice!).
However, it’s still important to get two or more quotes to compare because you never know how much money you could potentially save. For example, the quote we got from our current builder and the quote we got from a different builder were almost bang on identical, except the other builder didn’t include any plumbing/electrical work or kitchen fitting, whereas our current builder had included all of these things in his quote and as you can imagine, work like this is not cheap (it would have meant thousands on top!) to say the least so the added money we would have had to fork out if we had gone for the other builder would have been ridiculous! I still to this day can’t make heads or tails of how the other builder could be so expensive for just the build alone, but it meant we got to choose the builder we had our heart set on anyway, so it was a win win for us.
We then were pencilled in for a date for the work to commence (which was actually brought forward by a few weeks in the end which was great!) and it was all systems go!
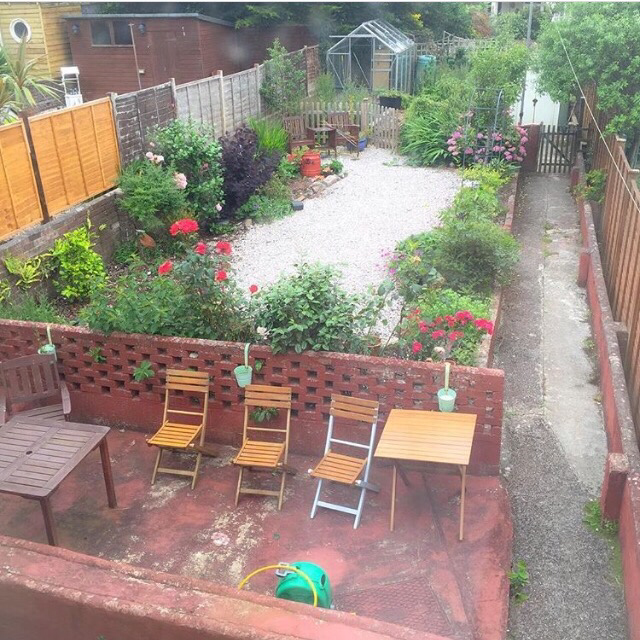
Here are some before pictures of the back of our house/garden…


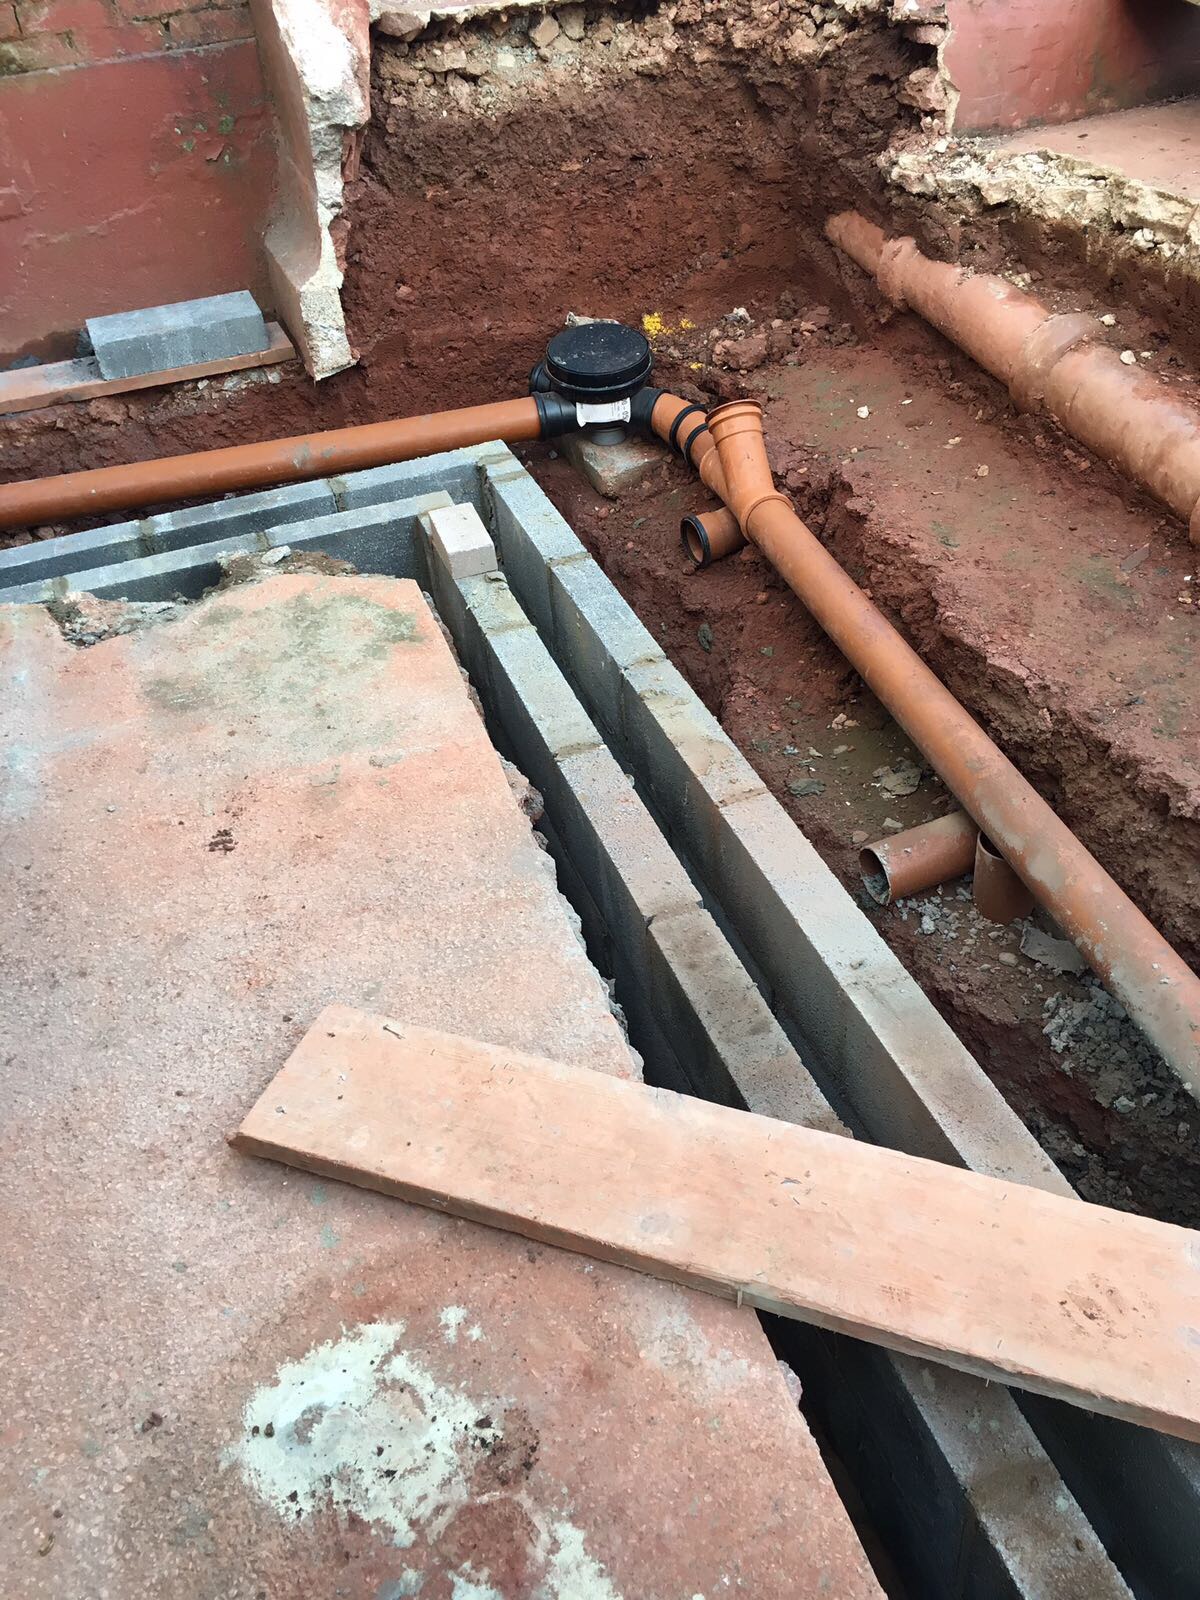
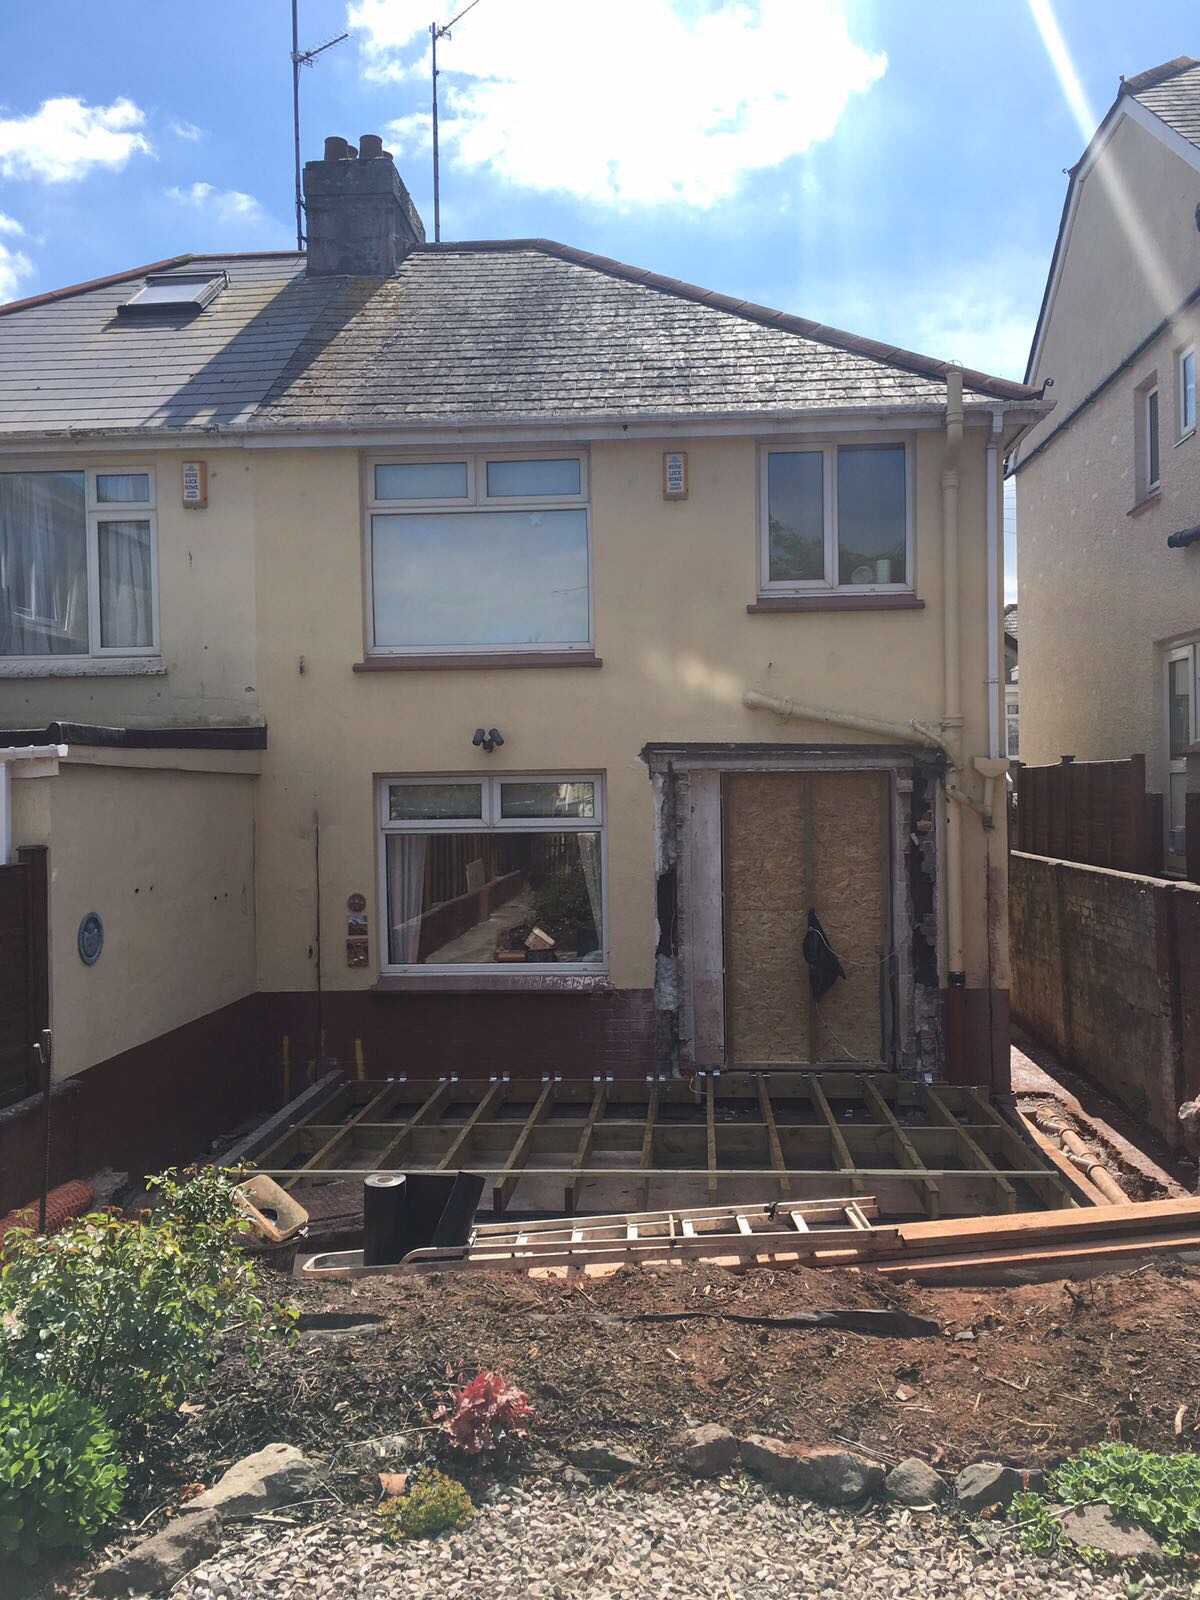
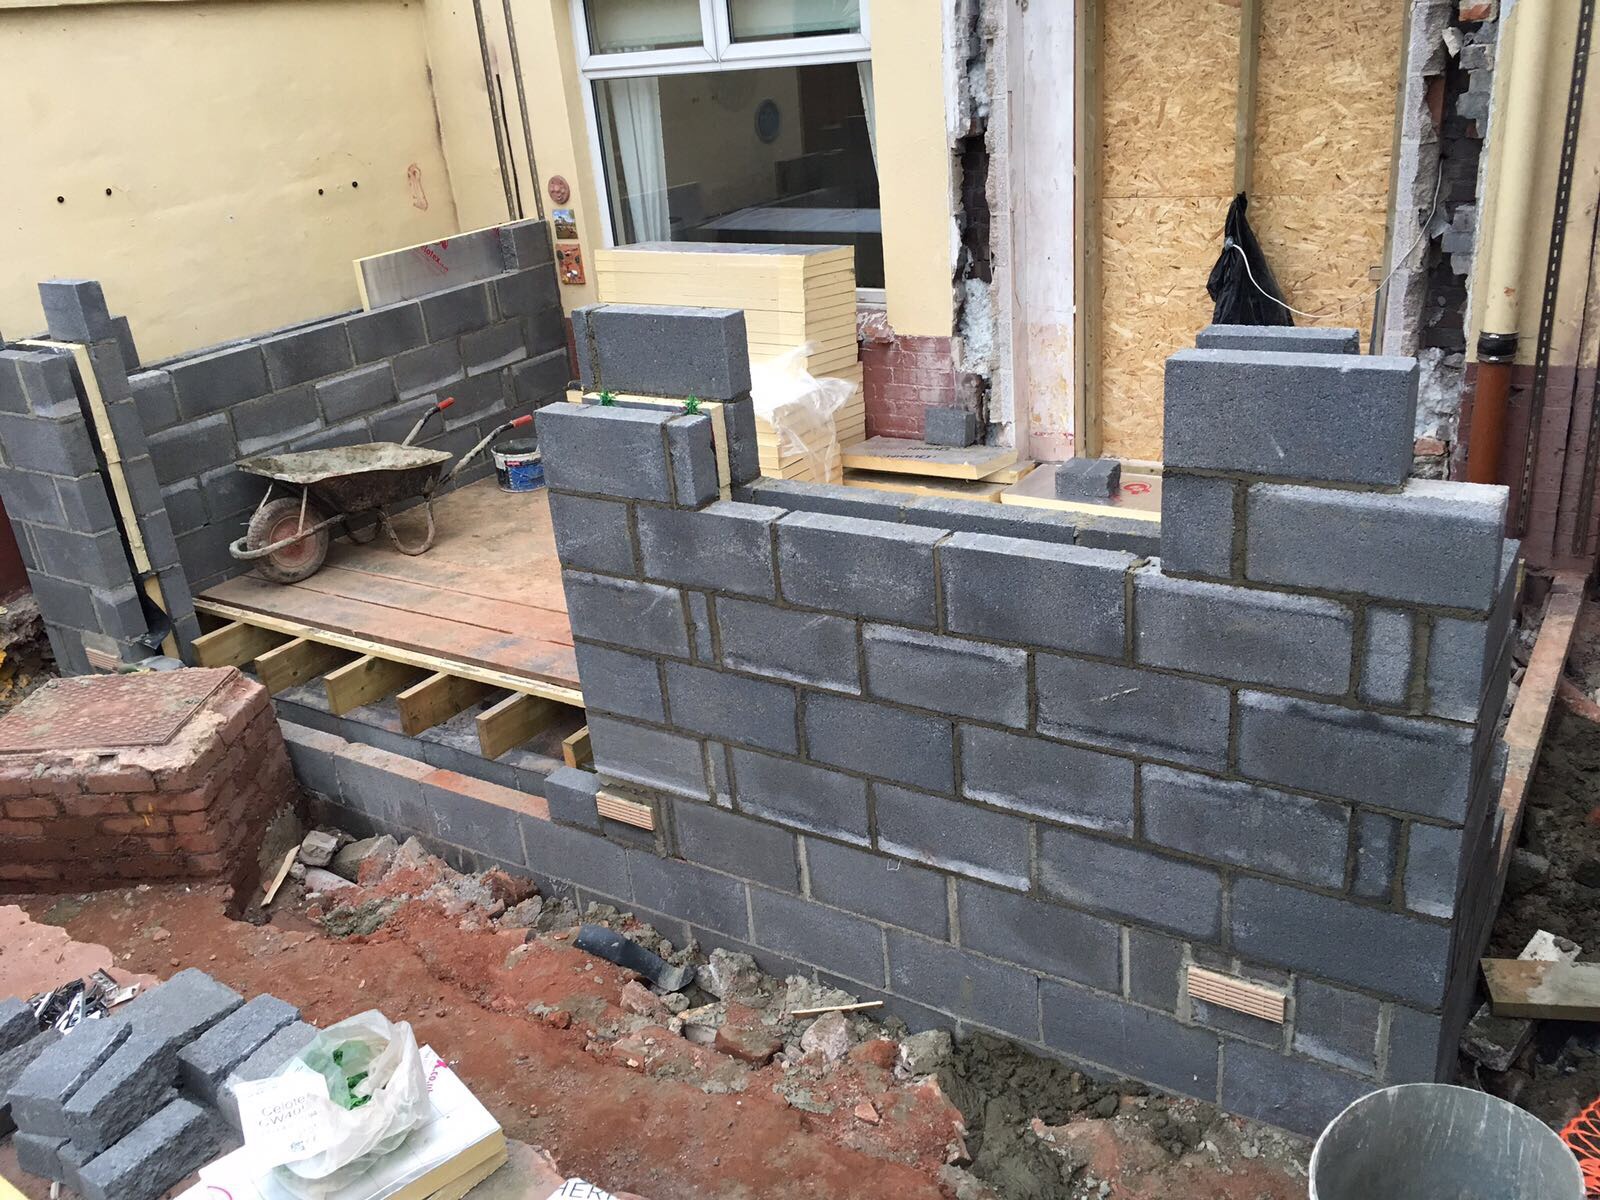
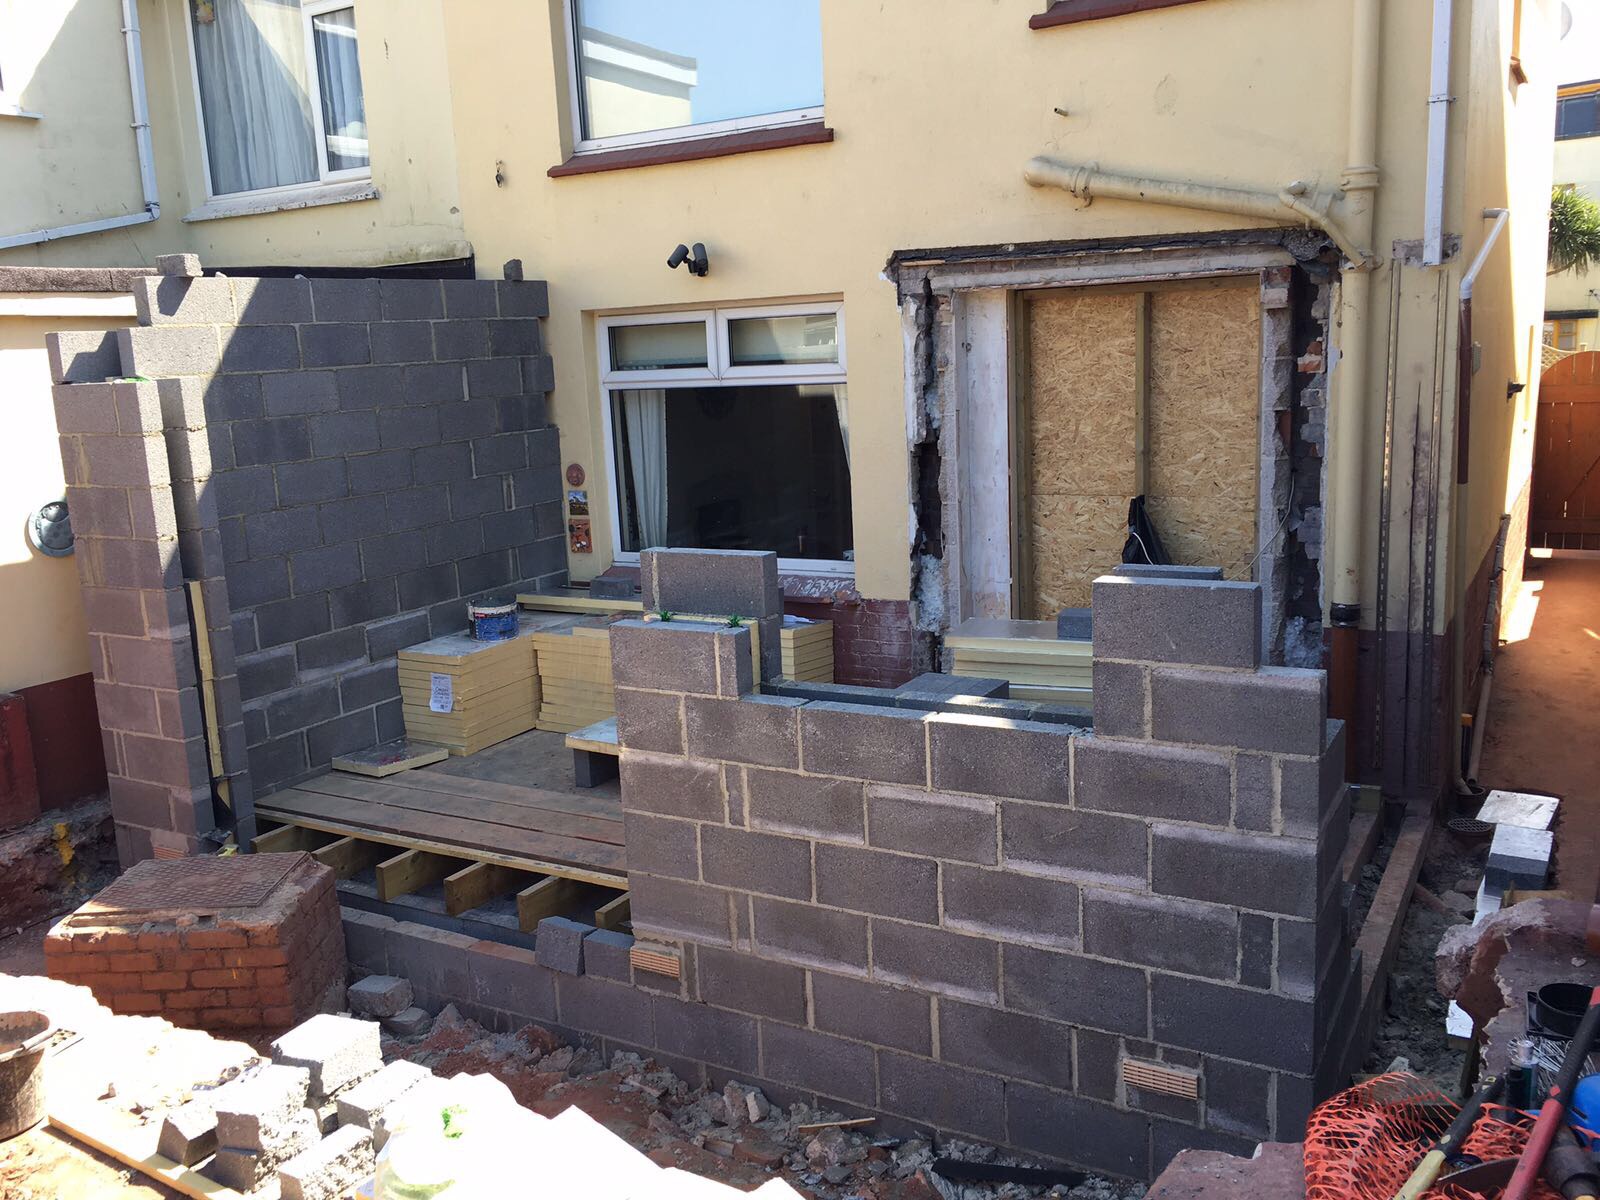
As you can see, there was already a small existing extension on the back of the house which was built in god knows when, but this needed demolishing and also the built up floor level and wall needed to be dug away. Unfortunately the path that runs from the front of our house around to the back is too narrow to fit a small digger through, so the poor labourers had to do the whole dig by hand! On the first day they started it was torrential rain and by the time 4pm came around they were completely soaked through to their pants the poor guys!


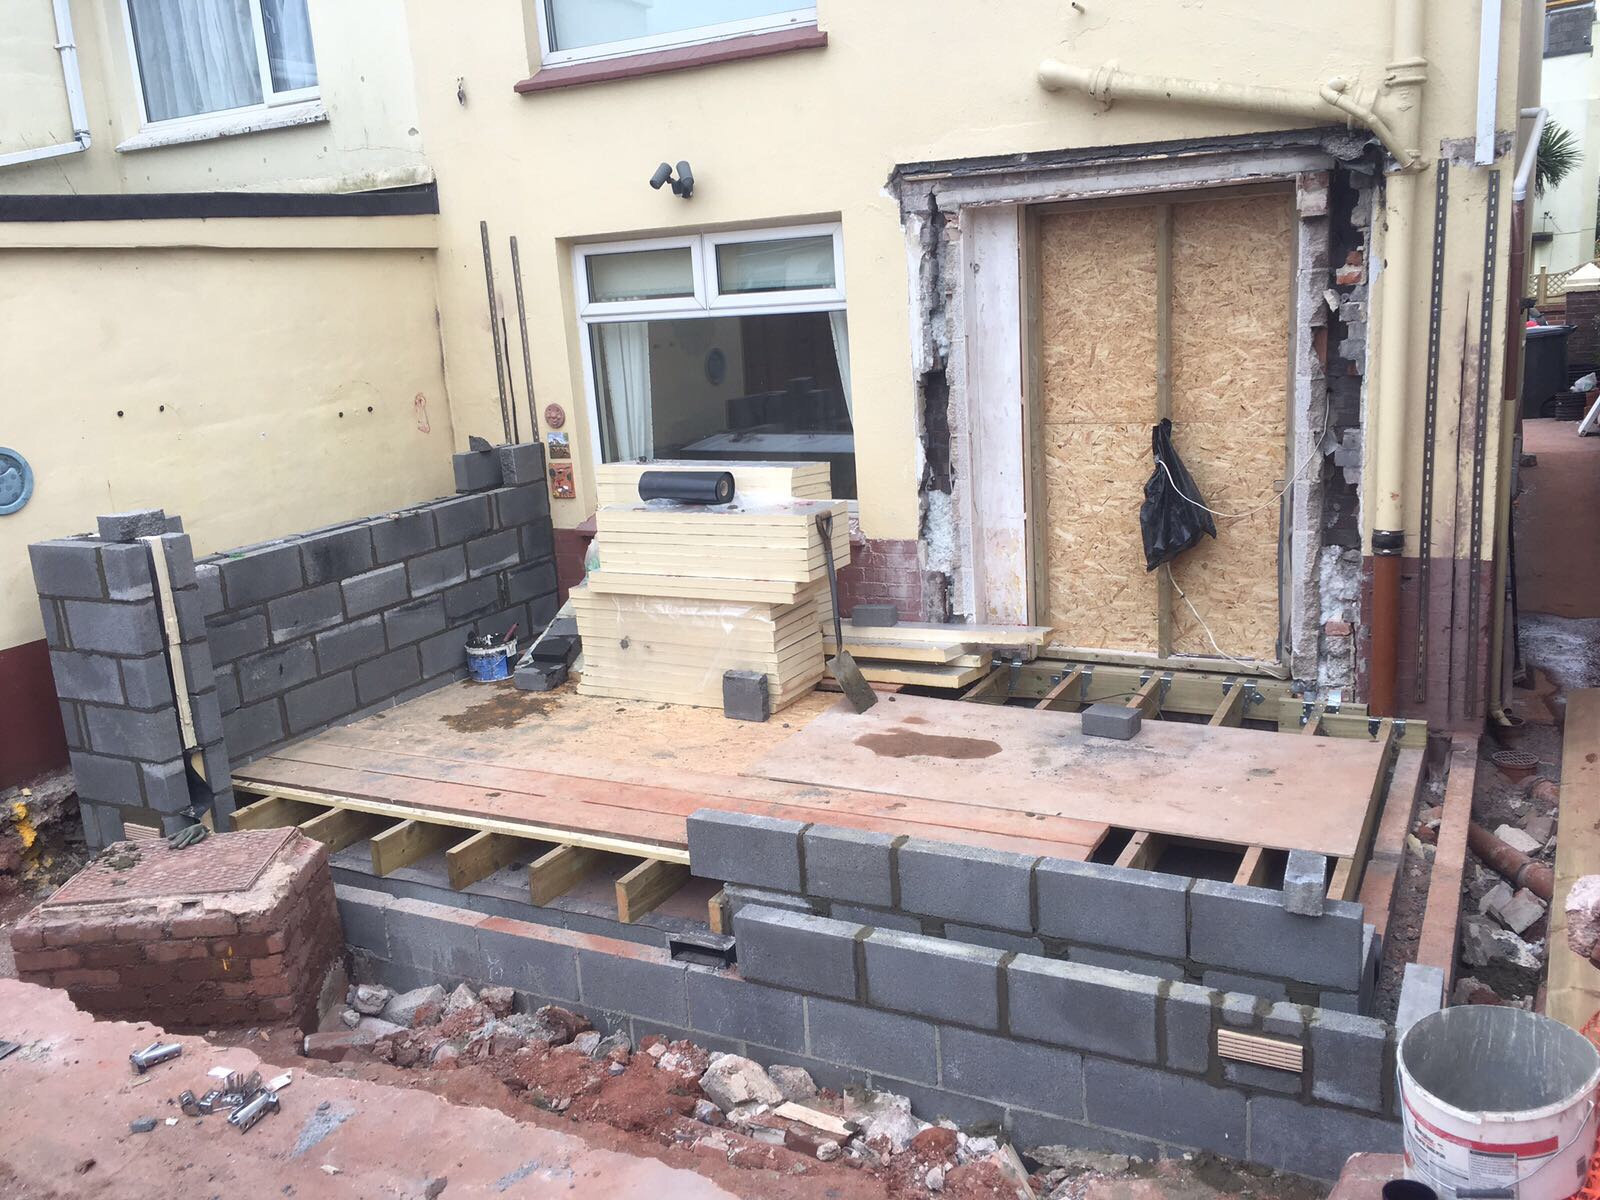
Once the dig was all finished it meant that the foundations could be laid and the carpenters were soon around to demolish the small existing extension and fit the flooring joists. It’s so surprising how much work they managed to get done in such a short space of time, although we have been incredibly lucky with the weather in Devon over the past few weeks.


I know a lot of people who say that moving out is the best option when it comes to having building work done, and if it were just ben, Hugo and I we probably would have, but we didn’t want to disrupt things for Noah and his routine so we decided to stay put at home and it’s actually been fine! Apart from one day where there was a complete blizzard of dust EVERYWHERE in the kitchen, but the carpenters were so kind and came in and cleaned all the kitchen surfaces and even swept and mopped my kitchen floor bless their hearts!
*Just a quick tip that I thought I would add in here for anyone who is going to be having similar work done in the near future, make sure you look after your workers! My mum and I have been baking them treats every week (lemon drizzle cake, chocolate brownies, banana muffins etc) and making sure they are topped up on tea and coffee throughout the day. I don’t know if it’s the motherly instinct in me that makes me want to look after people but at the end of the day, the way I see it, they are working very hard to make our dream vision a reality and I know there are lots of people who don’t even acknowledge tradesmen who are doing work for them let alone make them a cup of tea which I just think is awful, so I like to try and look after them as best I can and make their working environment as nice as possible*
So, once the joists for the floor were all in place, the build began! This for me was such a satisfying week of labour to witness, I loved going to work in the morning and then coming home at the end of the day to see how the walls were progressing and getting higher and higher each day! All of a sudden a great big open space soon began to take shape as a real room! Especially once they had built around the gaps for the window and the sliding doors to be fitted, it made it a lot easier to be able to start properly imagining what it was going to look like at the end!


With regards to doors, it took us a little while to decide for sure what we wanted. It was a case of bifolds vs sliding doors vs french doors (see pictures of examples of all three kinds below).
Bifold doors
Sliding doors 
French doors 
In the end, we decided on sliding doors for a few reasons, including being significantly less expensive than bifolds and also providing more glass and natural light than french doors. The back of our house where the kitchen sits doesn’t get a huge amount of natural light due to the position that the sun rises and sets, so it’s naturally a darker room and so we wanted to make sure we could maximise natural light in any way possible. We have also opted to have 2 large velux windows fitted in the flat roof to bring even more light in.
We did originally love the idea of having bifold doors all the way across the back wall, but this would have then restricted the amount of kitchen space we would have had for units and things and also, our builder told us that he has fitted many bifold doors for people who live locally and many of them have admitted that although they love them and they do give that wow factor, they seldom have them fully open because sadly we aren’t particularly fortunate when it comes to British weather. So, sliding doors were the winners for us.
We are now currently at the stage of having the main kitchen wall knocked through, having the supporting steels put into place and having the entrance door into the kitchen from the hallway moved back so that we gain even more space in the room. Once the roof has been put on and the window/sliding doors are in place and the walls are plastered I will do another post. It’s such a big job with so much involved that if I don’t break it down into a few posts, I’d be rambling on for ages and I know that to most people this is probably a bit of a boring read, but to us it’s incredibly exciting and with it being the most extensive work we’ve ever had done before, we love seeing the changes and progress made every day.
I look forward to being able to post about the rest of the progress and then the final result!
Thank you for reading,
Love Paige xxx


